How to Sync Video and Audio: Fix Offset and Drift
Learn how to sync video and audio: check lip-sync tolerances, tell offset from drift, fix timing step by step, and verify sync before you publish.
You've aligned the clap at the start of your talking-head clip, played the first few seconds, and everything looks right. Two minutes later, your mouth moves, then your voice arrives a beat behind it. So you nudge the audio again, the ending looks fine, and now the opening is wrong.
That loop usually means you're treating the wrong problem. When you sync video and audio, there's a difference between a gap that's the same from start to finish and a gap that grows. The first needs one shift. The second needs you to fix how your editor interprets the file before you move anything.
Sync Tolerances You Can Check Against
"Close enough" isn't a guess. You can measure the gap in milliseconds, written as ms, and compare it with limits people notice. Research summarized by the U.S. National Telecommunications and Information Administration reports that the Advanced Television Systems Committee recommends audio should never lead video by more than 15 milliseconds and never lag it by more than 45 milliseconds, as described in the audiovisual synchronization research summarized on arXiv.
| Audio direction | Expert detectability | Average acceptability | Lip-sync assessment limit | Strict broadcast target (ATSC) |
|---|---|---|---|---|
| Audio leads video | 45 ms | 90 ms | 140 ms | 15 ms |
| Audio lags video | 125 ms | 185 ms | 100 ms | 45 ms |
Audio leads video means you hear the word before the mouth forms it. Audio lags video means the mouth moves first. Viewers generally tolerate a slight lag more readily than speech arriving early, because early speech contradicts what the eyes are still waiting to see.
How to Use These Numbers on a Real Clip
Say your talking-head clip measures 70 ms of audio lead. That's inside average acceptability, so casual viewers may not object, but it's outside the strict target and past expert detectability. A client pausing frame by frame will likely spot it, even if a phone viewer scrolling quickly won't.
A clip inside the strict target passes in any environment. A clip inside acceptability but outside that target is a judgment call, not a pass you can defend with a number.
Practical rule: Pick the strictest place your clip will play, write that tolerance on the project, and edit to that number from the start.
That one decision stops most arguments later. You aren't asking whether it "feels synced." You're checking whether your measured gap fits the limit you chose before anyone pressed play.
Tell a Fixed Offset From Drift First
Don't slide anything until you know whether the gap stays still or grows. This test decides every fix that follows, and it takes only a few minutes on the original file.
- Probe the file: Open it in ffprobe or your editor's media info panel. Note each stream's start time, duration, frame rate, and audio sample rate.
- Find an early sync event: Look in the first ten seconds for a clap, a clicker, a door closing, or another sharp sound with a clear visual match.
- Measure the early gap: Note the time of the visual event and the matching audio spike. Subtract one from the other to get the gap in milliseconds.
- Repeat near the end: Find a similar event in the last ten seconds of the same file and measure again.
- Compare the two numbers: Decide whether they match or whether the second gap is larger.
The FFmpeg filters documentation supports the tools behind this distinction, where a stable offset can be shifted and timestamp-aware resampling can adjust audio continuously. In plain terms, a stable gap needs one correction, while a growing gap needs the timing of the whole file rebuilt.
What the Two Numbers Tell You
For example, say a three-minute phone recording shows a clap 40 ms out near the start and 400 ms out near the end. That's not one offset you misjudged. The gap grew during the clip, so shifting the whole audio track will fix one end and break the other.
If both measurements match within about 5 ms in your worked check, treat it as a fixed offset. One shift should hold across the file. If the end gap is clearly larger, treat it as drift and don't waste time nudging.
A short clip can hide drift because the error hasn't had time to grow. Always check the end, not just the opening.
One last clue comes from the probe. If it reports variable frame rate, expect drift until you prove otherwise. Phones and screen recorders often record that way, even when the file name and preview look completely ordinary.
How to Align a Fixed Offset Step by Step
Once you've confirmed the gap is constant, alignment is straightforward. You're matching two versions of the same moment, then moving one track so those moments sit on top of each other.
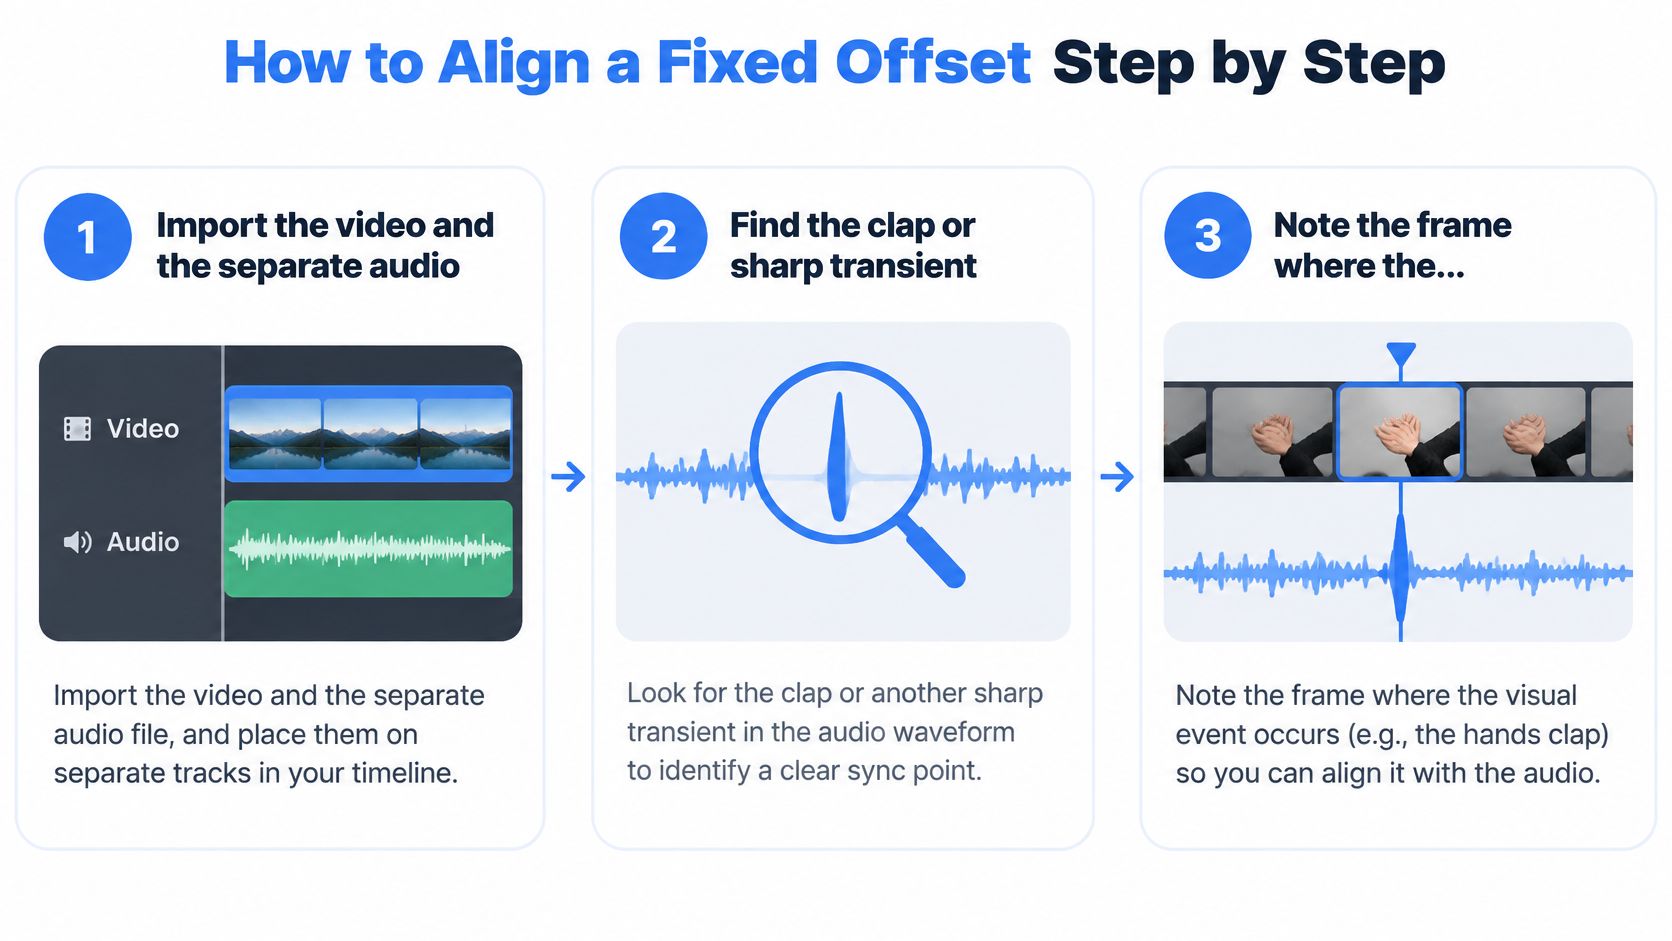
- Import both tracks: Place the video and the separate audio on separate timeline tracks so you can move one without moving the other.
- Mute nothing yet, but identify the reference: Keep the camera audio visible if you have it, because its waveform is often the easiest thing to match against the cleaner recording.
- Find the clap: Zoom into the waveform until you can see individual frames and the sharp spike, called a transient, where the clap lands.
- Note both frames: Mark the frame where the hands meet in the video and the frame where the audio spike starts.
- Slide the audio: Move the audio clip so the spike lines up with the visual frame. If your editor can't nudge by milliseconds, trim the start of the audio instead.
- Check both ends: Play the first few seconds and the last few seconds. If both sound right, the offset was fixed.
A Worked Example With Real Arithmetic
For example, the clap appears at 3.120 seconds in the video and at 3.460 seconds in the separate audio. Subtract the smaller number from the larger one and you get 0.340 seconds, or 340 ms. The audio is late, so you slide it 340 ms earlier or trim 0.34 seconds from its start.
Trimming shortens the audio file's available head, so check that you haven't cut into a word or breath you need. Sliding keeps the full clip intact and is safer when your editor allows it. Either way, recheck the end after the move, because that's where a wrong diagnosis shows up.
Auto Sync and the FFmpeg Route
Most editors offer a waveform-based sync command that matches a separate recording to the camera audio automatically. Use it, it's fast and usually accurate on clean dialogue. Just remember it only corrects the starting offset, so it can't rescue a file that's drifting underneath.
If you work in FFmpeg, -itsoffset shifts the input that follows it. For example, to delay a separate audio input in a hypothetical 0.25 second correction, you'd place it before that audio input like this: ffmpeg -i video.mp4 -itsoffset 0.25 -i audio.wav -map 0:v -map 1:a -c:v copy -c:a aac output.mp4. The -map flags tell FFmpeg to take video from the first file and audio from the second.
Don't stack guesses. Measure once, apply one shift, then verify at the end. If the end is still wrong after a clean start, stop aligning and treat the file as drift instead.
Fix Drift Without Re-Syncing Every Cut
If you keep re-syncing individual cuts, you're chasing a moving target. Drift usually isn't an alignment problem at all. It's a media normalization problem, meaning your video and audio weren't recorded or interpreted on the same steady clock.
Phones and screen recorders can change frame timing during capture while audio continues at a fixed sampling rate, and low-light recording can reduce the effective video frame rate, as explained in this guide to syncing audio and video. The picture stretches or compresses against the sound. That's why a perfect opening check can still produce a visibly wrong ending.
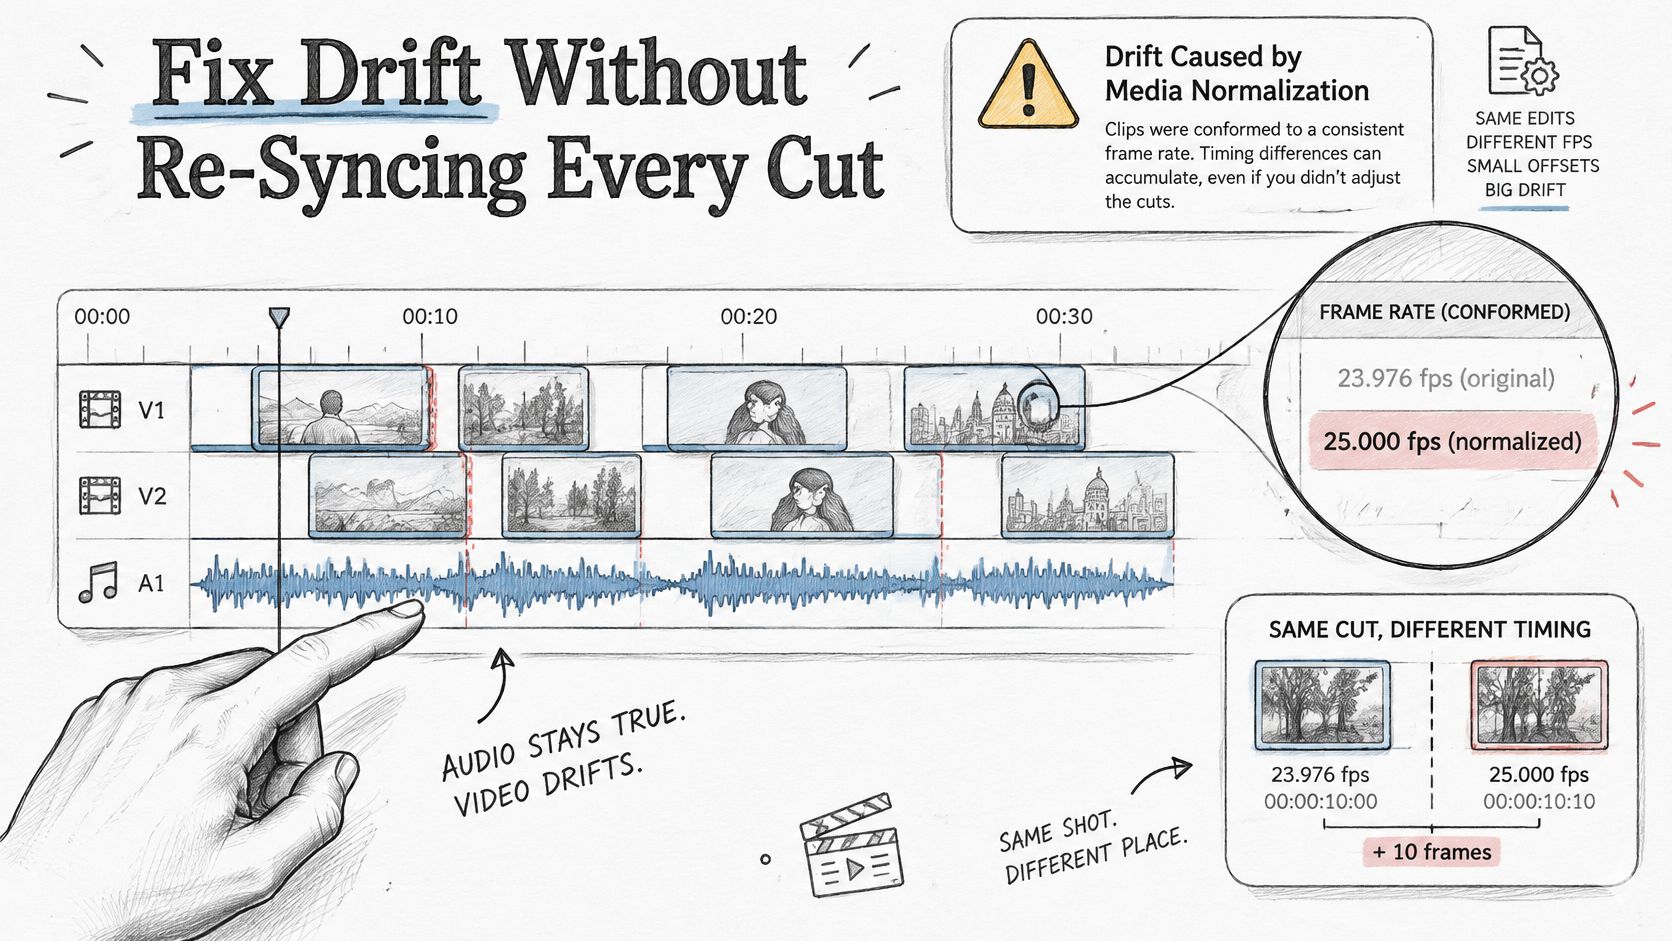
- Confirm variable frame rate: In ffprobe, compare the average frame rate with the actual frame rate. If they differ, the file's frame timing isn't constant.
- Keep the original untouched: Work on a copy so you can return to the source if a conversion goes wrong.
- Transcode to constant frame rate: Convert to the frame rate your project uses, commonly 30 or 60 fps. A typical command is
ffmpeg -i input.mp4 -vf fps=30 -af aresample=async=1 -c:v libx264 -crf 18 -c:a aac output.mp4. - Re-run the start and end check: Measure the new file in both places before you edit it.
- Edit after normalization: Add cuts, captions, and inserted shots only once the gap holds steady.
The aresample=async=1 part lets the audio timestamps adjust to follow the video clock instead of assuming both clocks already agree. The fps filter rebuilds the picture at evenly spaced frames. Together, they give your editor one consistent timeline to cut on.
Quality Caveats Worth Knowing
Every re-encode loses a little quality, so use a low CRF value such as 16 to 18, where lower means higher quality and a larger file. After transcoding, check rotation and colour tags, because phone footage sometimes carries orientation or colour information that a conversion can misread. A file that plays upright before conversion and sideways after it hasn't broken, its tags just need attention.
For the next shoot, lock your phone to a fixed frame rate if the camera app allows it and add light rather than letting the phone slow its capture in the dark. Hand alignment is still fine for one short clip with a constant gap. It just isn't a treatment for drift.
Symptoms, Causes and Fixes for Stubborn Sync Problems
When something still looks wrong, start from what you can see. The symptom usually points to a small set of causes, and half of them aren't sync problems in the original recording at all.
| Symptom | Likely cause | Fix |
|---|---|---|
| Sync holds at the start, drifts toward the end | Variable frame rate video or mismatched clocks | Normalize to a constant frame rate, then check the end again (re-export, see drift section) |
| Audio jumps after a cut | Cut applied to video only, or clips not linked | Cut audio and video together and link the clips (minutes) |
| Captions lag speech after silence is removed | Captions still timed to the original timeline | Re-time captions or regenerate them after cuts (minutes) |
| One clip in a batch is off, others are fine | Sample rate mismatch, such as 44.1 kHz versus 48 kHz | Convert all sources to one sample rate before import (re-export) |
| Video stutters or freezes in low light | Dropped frames during capture | Re-export at a constant frame rate, then reshoot at a fixed frame rate (re-export) |
| In sync locally but off on TV or after upload | Platform re-encoding or wireless audio latency | Export a test clip to the target device; add audio delay for Bluetooth (minutes) |
| Preview looks wrong while processing | Upload still running or tab closed early | Keep the browser tab open until the upload finishes (minutes) |
The Three Causes That Surprise People Most
Captions lagging after silence removal catch many creators out. The audio and picture can be perfectly matched while the captions still follow timestamps from before the pauses were removed. Regenerate or re-time the captions after your last cut, not before it.
One bad clip in a good batch usually isn't mysterious either. If nine recordings behave and one doesn't, compare that file's sample rate and frame rate mode against the rest before you touch the timeline. The odd file out is almost always the odd settings out.
A broken looking preview may not be a broken file. If a video is stuck processing, keep the browser tab open until the upload finishes. After that you can close it and we keep working on the video, so wait for that point before judging what you see.
Time check: Fixes marked minutes happen inside your editor. Fixes marked re-export mean rendering a new file, so do those before detailed caption and cut work.
Verify Lip Sync and Lock the Timeline Before Export
Casual playback is a weak final test because your brain adapts to small errors after a few seconds. Use a measurable event instead, at three points in the finished timeline, so a bad cut in the middle can't hide between a good start and a good ending.
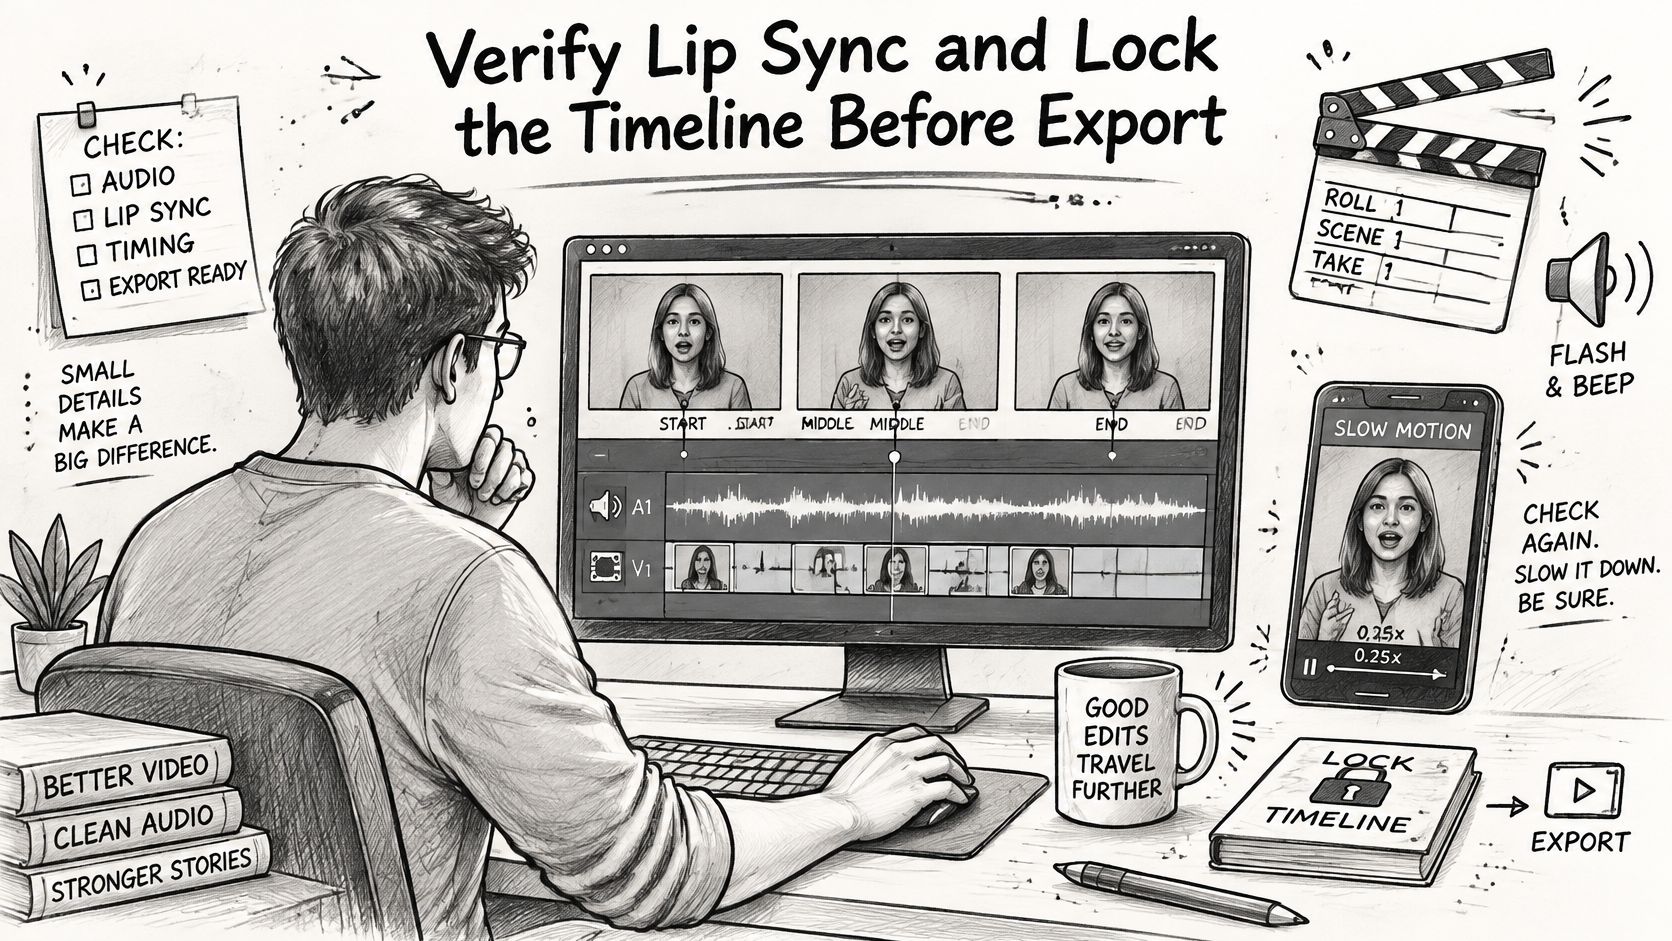
- Place test events: Put a clapper, hand clap, or flash-and-beep event near the start, middle, and end of the timeline, after cuts and silence removal.
- Record screen and speaker together: Film the screen with a phone while the speaker plays aloud, so one recording contains both the visual event and the sound.
- Use slow motion if you have it: At 240 frames per second, each captured frame represents about 4.2 milliseconds, according to ITU-T J.248 guidance on audiovisual synchronization.
- Count the frame difference: At each test point, count frames between the visual event and the audio onset, then convert that count into milliseconds.
- Subtract sound travel time: Sound takes time to cross the room from speaker to phone microphone. Correct for that distance so you don't blame your export for your room.
- Compare with your chosen tolerance: Each of the three results has to fit the limit you set for the project, not just the first one.
- Spot check captions: Confirm words appear as they're spoken after any speed change or time stretch, especially right after an edit.
If your phone sits two metres from the speaker, that travel correction matters more than people expect. Skip it and you'll "fix" an export that was already correct, pushing a good file out of sync in the other direction. Measure the distance, apply the correction once, and write it down for repeat tests.
The Pre-Export Lock Checklist
- One frame rate: Every source runs at the same constant frame rate as the project.
- One sample rate: Every audio source uses the same sample rate, with no odd file left unconverted.
- Zero-based timestamps: Timelines start at zero, so cuts and captions reference the same origin.
- Captions re-timed last: Caption timing was generated or checked after the final cut, not before it.
The middle check earns its place on real projects. A file can be in sync overall and still jump locally where a pause was removed or a clip was trimmed on one track only. Catching that before export is far cheaper than re-rendering after a client or viewer points at the exact second.
Automated editing can handle much of the repetitive work here. We return an edited video with the clip cut, captioned word by word, with a hook, zooms and your product shots, in the style of a video you choose. You should still review your video before publishing it, because automated output can contain mistakes, including in transcribed captions.
Finish with a device check that matches how people will watch. Play the first ten seconds, one cut in the middle, and the final line on the phone you plan to post from, using its speaker rather than Bluetooth headphones. Then run the start and end gap check on your next clip before editing anything, so the diagnosis becomes habit instead of rescue work.
If your footage is in sync but still needs cutting, word-by-word captions, a hook, zooms, and your product shots placed in the style of a video you choose, Mimic can turn that raw talking-to-camera clip into a ready-to-post video for you. Upload your next clip, review the result before publishing, and spend your time recording instead of nudging waveforms.