Make a Highlight Video in 2026: Steps, Captions and Checks
Learn how to make a highlight video: pick the strongest moments, build a hook, add captions and music, then check the export before you post.
You've got the footage. Maybe it's 40 minutes of a founder talking into a phone, or a customer call where she finally says the thing your marketing copy has been reaching for. Somewhere in there is a 30-second video that would work on a feed. Finding it, and knowing when to stop looking, is the whole job.
A highlight video isn't a summary of the recording. It's the two or three moments that survive a rewatch, put in an order that holds attention for as long as the format allows. Get that right and the edit takes an afternoon. Get it wrong and you'll spend a week polishing clips nobody finishes.
Here's the working order I'd use on any raw clip: choose the moments, clear the rights, sequence them, layer captions, then check the export on a phone before it goes anywhere.
Pick the Moments That Earn a Place in the Edit
Set the length target before you open the footage, because it decides what counts as a keeper. HubSpot's 2024 video marketing report found that 42% of video marketers rated 21 to 30 seconds as the optimal short-form duration, with another 32% choosing 31 to 60 seconds. That puts roughly three-quarters of respondents inside a 21 to 60 second window, and the same survey reported that 83% of video marketers used short-form video against 39% for long-form.
A highlight is the best of a recording, not a compression of it. Forty minutes of talking head usually contains two or three moments that would stand up alone; the rest is setup, repetition and housekeeping. Your job is to find those fast and be ruthless about everything else.
Score every candidate on three questions
Watch the raw file once, straight through, pausing only to drop markers. Don't take notes yet and don't start cutting. That first pass is for your reactions, and the places you lean in, laugh or nod are the places a stranger will too.
Then return to the markers and score each moment against three questions:
- Does it show a result, a reaction or an explanation? Anything that does none of the three is filler, however charming.
- Can it stand without setup? If it needs three sentences of context, it isn't a highlight, it's a fragment.
- Does it make the viewer want the next second? This is the question that separates a good clip from a usable one.
Keep what passes two of the three and drop the rest without sentiment. A clip you love but can't justify costs you the pacing you gained elsewhere.
Practical rule: a customer saying the product saved her two hours names a result and belongs in the edit. A warm-up about your morning does not, however well it's delivered.
The table sorts each keeper into the role it plays. Most weak highlights fail for the same structural reason: every keeper is an explanation and none is a result.
| Moment type | What it looks like | Where it goes |
|---|---|---|
| Result | A number, finished product or clear before-and-after | Opening hook |
| Reaction | A laugh, a surprised look or a plain "that worked" | Proof, straight after the hook |
| Explanation | One sentence that says why the result happened | Middle, before the payoff |
| Demonstration | Hands or a screen showing one step | Proof, kept short so it does not stall |
| Payoff | The final outcome or the call to action | Last 3 to 5 seconds |
When the table is full, write one sentence describing what the viewer should feel or do after watching. Then hold every clip against it. A moment that doesn't move the viewer toward that sentence is a moment you're keeping for yourself, not for them.
Check Rights Before You Build Around a Clip
The assumption that causes trouble is that a clip is usable because it's public, or because the download worked. Neither is a licence. Before you build a story around anything you didn't shoot, run the checks below and keep the evidence somewhere a colleague can find it.
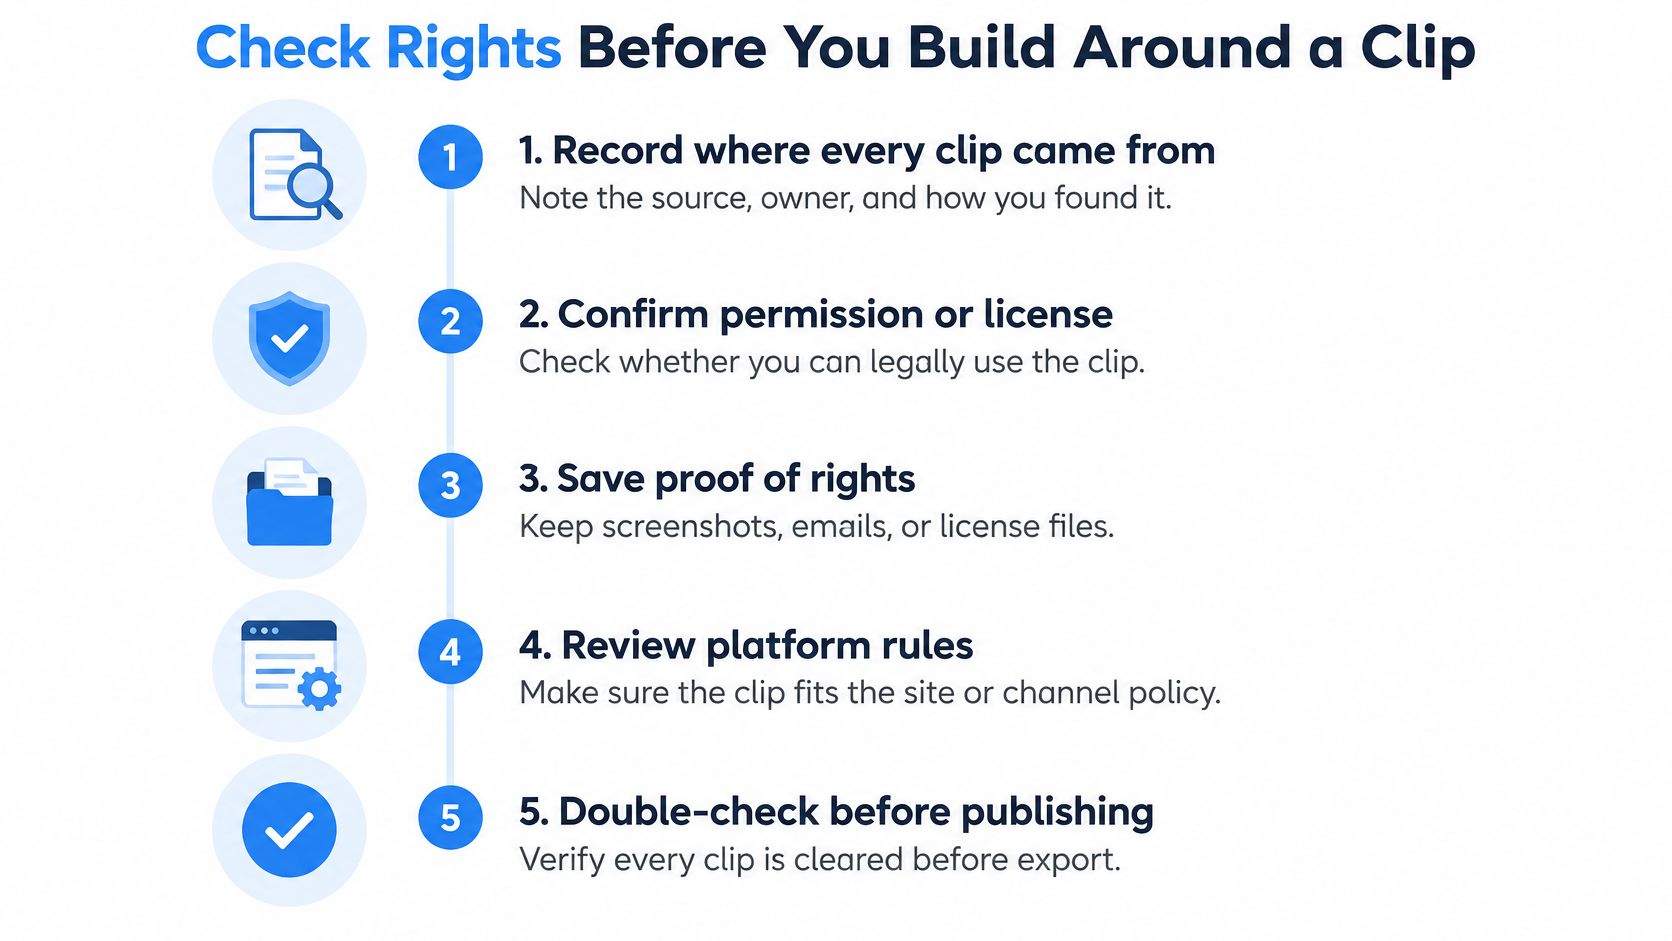
- Record where every clip came from. Note the source file, who filmed it and the date. A folder of
clip_04.mp4files is useless six months later when a claim lands and you need to show provenance. - Identify every person on screen. Hold a signed release for anyone appearing in a commercial video. Group shots from events are the ones editors forget.
- Read the music licence for scope, not just existence. Permission often varies by territory, platform, duration, paid advertising use and whether you're editing the track. A licence that covers an organic post may not cover the same audio inside a paid ad.
- Get reuse confirmed in writing for sports footage, livestream clips and creator submissions. "It was on YouTube" is not permission.
- Keep a replacement plan. Hold a second licensed track at a similar tempo so a claim that mutes your audio doesn't take the whole video down with it.
Escalate to a lawyer when a clip shows a minor, a prominent trademark logo, or a statement about a competitor. Those three carry risk a checklist can't price.
The cost of doing this late is what people underestimate. Build a narrative around a song you can't license and you're rebuilding after export, usually on the day it was due. Run the rights pass before you write the story, not after the first cut.
Clear the rights before you commit to the story. A clip that can't ship is not a creative decision, it's a delay.
How to Sequence Your Highlight From Hook to Payoff
A highlight is a sequence, not a bag of good clips. Order does the work: the same four moments can hold attention for 40 seconds or lose it by second four, depending on which one opens.
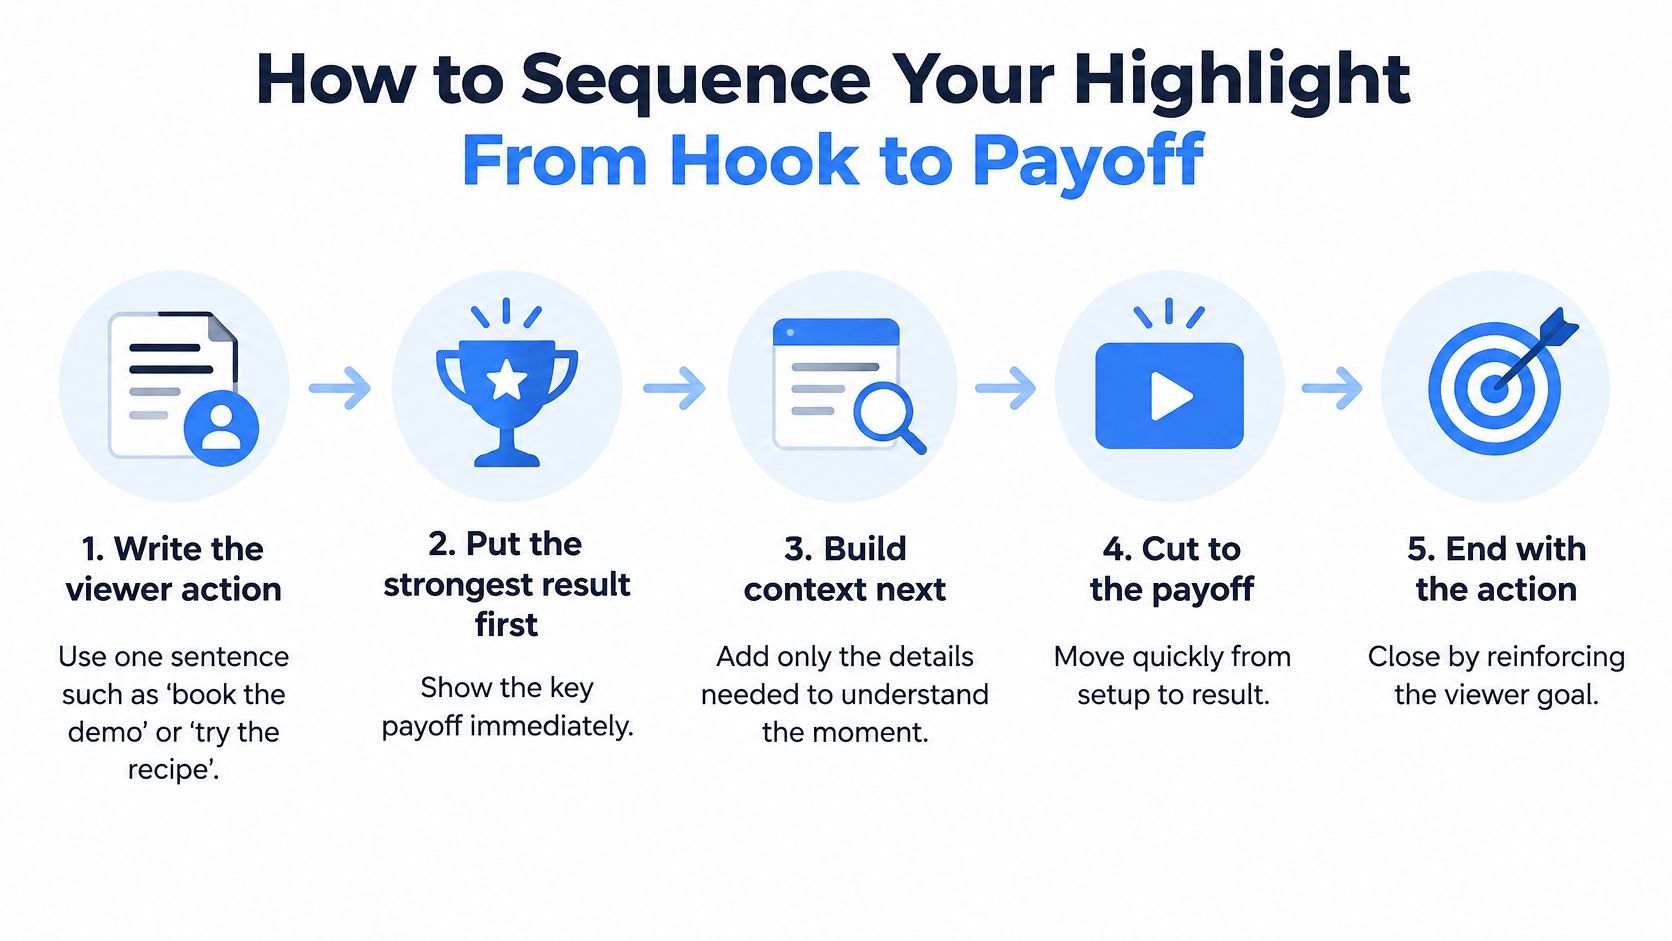
- Write the viewer action in one sentence. "Book the demo." "Try the recipe." "Follow for part two." Every later choice gets easier once that sentence exists, from which clip opens to which line earns a text cue.
- Put the strongest result first. The retention framework published by Terra Market Group places the proposition within the first 3 seconds and the main hook within the first 6, which makes the opening the highest-priority pass in the entire edit. Logos and slow introductions spend seconds you don't have.
- Build the middle as a promise, then proof. Say what the viewer is about to see, then show two or three pieces of evidence that escalate. Smallest proof first, the claim-making proof last.
- Reset the visuals every 6 to 8 seconds. A crop change, a cut to B-roll, a text cue or a product reveal stops a talking head from stalling. Push past that and extra cuts start costing clarity and introducing continuity errors, so stop when the sequence gets harder to follow rather than easier.
- End on a payoff that echoes the opening. Restate the result from the first three seconds in the last three to five. The viewer should feel the loop close, not the video run out.
Two habits speed this up. Cut three to five alternative openings against the same middle and keep the one that lands fastest, and lock the cut before you touch music or effects, because polishing a sequence you're still restructuring wastes both passes.
Then watch the finished order once without pausing. That single viewing does more diagnostic work than a dashboard: mark every point where your attention drifts and remove those seconds.
Once a version is live, the retention curve tells the same story in numbers. A steep early drop usually means a slow opening or a mismatch between the title and the first shot. A localized dip points to one weak segment, which is a far cheaper fix than a rebuild.
| Element | Timing target | Purpose |
|---|---|---|
| Proposition | Visible within the first 3 seconds | Tells the viewer the outcome |
| Main hook | Lands within the first 6 seconds | Holds attention through the opening |
| Visual reset | Every 6 to 8 seconds | Prevents visual stagnation |
| Payoff | Last 3 to 5 seconds | Repeats the opening result to close the loop |
The opening decides whether the rest gets watched. Spend your hours there before anywhere else.
Layer Captions, Music and Transitions Without Clutter
Captions go in before the music does. A highlight that only works with sound is a highlight a large share of the feed can't follow, and the viewer who scrolls past never tells you which second lost them.
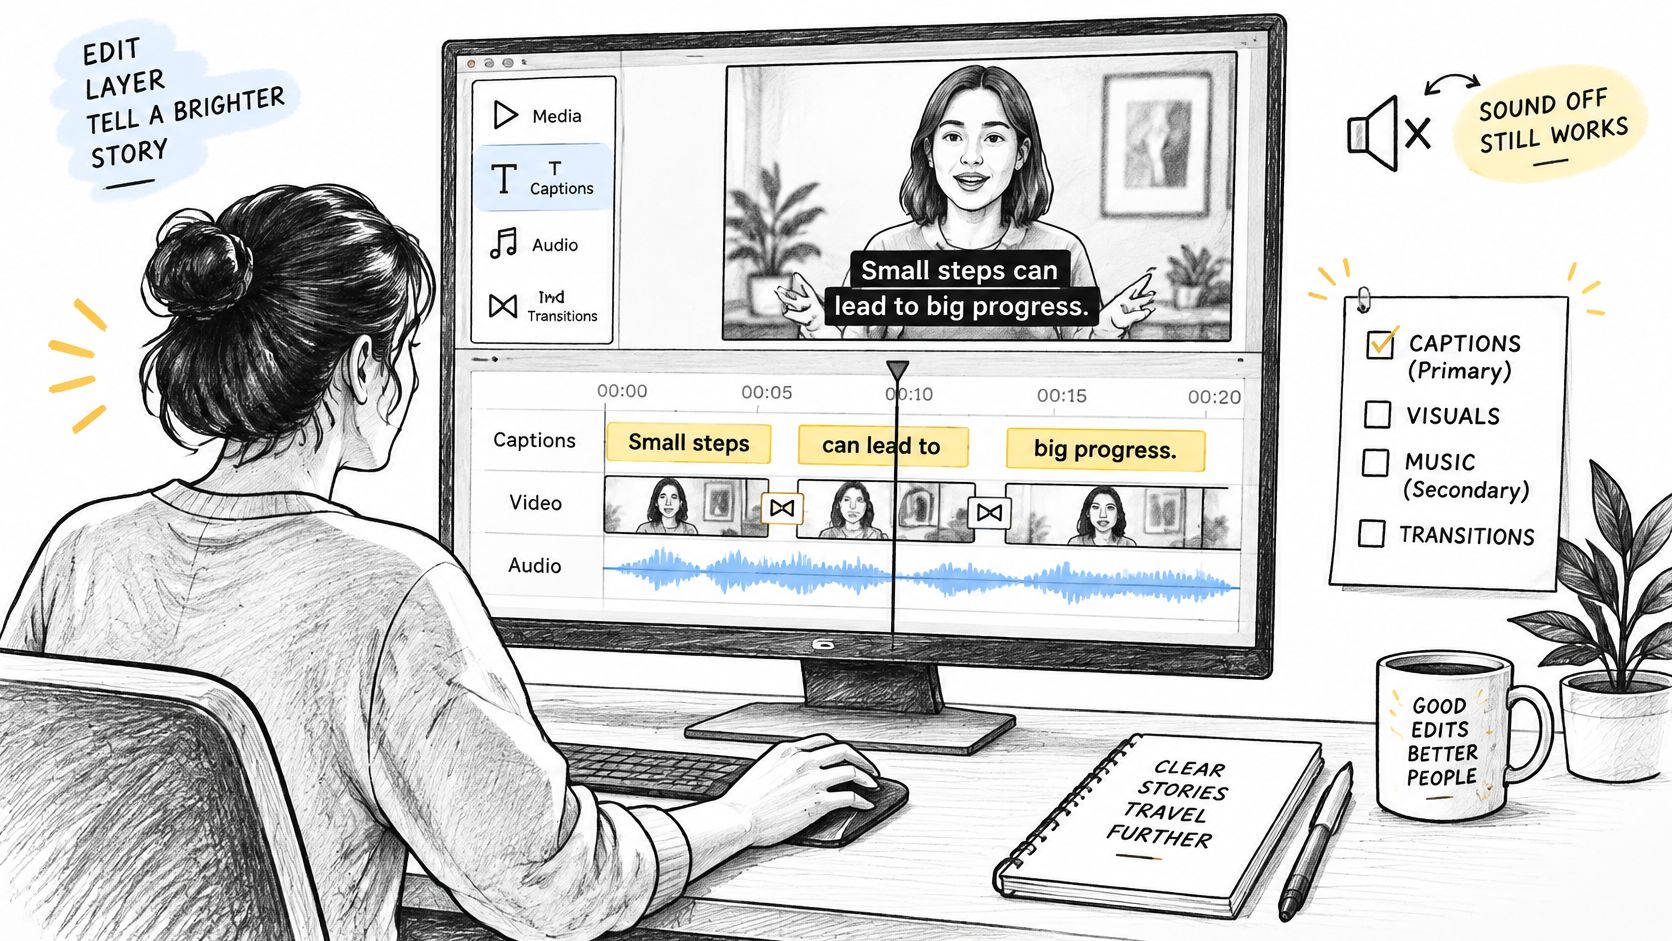
Facebook's research, summarized in this breakdown of social video accessibility, found that 41% of videos were incomprehensible without sound or captions, while captioned videos produced 12% more viewing time and 135% more organic reach. Ofcom data cited in the same piece indicates that 80% of caption users are not deaf or hard of hearing, which makes captions a mainstream viewing habit rather than an accommodation bolted on at the end.
Auto-captions are a starting point, not a track
Read the full transcript against the audio and fix the names, numbers, product terms and anything the recogniser guessed at. Keep the speaker's meaning rather than a tidier version of it, because a caption that paraphrases changes what the person said.
For layout, hold each caption to one or two lines, change it on a phrase boundary rather than mid-clause, and keep it clear of the face, the product and the call to action. Check contrast on a phone screen in daylight instead of a calibrated monitor. If your audience speaks another language, build a translated subtitle track as a separate file, since that's a different job from captioning the original speech.
Music sits underneath the voice, not across it. Set the level so words stay clear on a phone speaker, then test on the speaker rather than headphones. If a track competes with the voice, cut the track. Raising the voice to beat the music flattens the delivery and makes the whole clip sound strained.
Cut the song, not the voice.
When the destination is a feed where the first frame has to earn a stop, an editing workflow built for TikTok is a better starting point than a general-purpose preset that assumes a horizontal screen and a patient viewer. The walkthrough below takes the layering order end to end if you'd rather watch it once before cutting.
Transitions are the last layer and the easiest to overuse. Pick by the job the join has to do, not by which one looks best in the menu.
| Transition | Works best for | Avoid when |
|---|---|---|
| Hard cut | Joining two clips from the same moment | Changing topic without a reason |
| Jump cut | Removing pauses and filler from a talking shot | The expression or head position changes sharply |
| Punch-in zoom | Emphasising one key line or number | Used on every sentence |
| Fade or dissolve | Signalling a jump in time or topic | Speed matters, as in a fast reel |
| Slide or whip | Energetic product reveals in fast reels | Captions must stay readable during motion |
Run the Final Check Before You Export
Watch the first three seconds of the exported file on a phone before you judge anything else. Encoding, cropping and platform reframing change the opening you approved on a desktop monitor, and the file in your timeline is not the file anyone sees.
Treat the export as a draft. Automated output can carry mistakes, including errors in transcribed captions, so review before publishing while fixes are still cheap. The pass is short: opening, captions, audio, crop, retention.
| Check | What to verify | Pass when |
|---|---|---|
| Opening | Watch the first 3 seconds after export | The proposition is visible and readable |
| Captions | Read them on a mid-range phone over mobile data | Each line reads in one pass with no mid-phrase breaks |
| Audio | Play on the phone speaker, then with earbuds | The voice stays clear over the music |
| Crop | Check the frame at the target aspect ratio | Face, product and text stay inside the frame |
| Watch time | Compare with your last five videos on the same account | Average watch time is at or above your baseline for similar clips |
Benchmarks are only direction. Judge the highlight against what your own account earns for clips of the same length and placement, because audience and topic bend the curve. If the new cut holds through the payoff but opens slow, tighten the first line; if it drops after the hook, remove a setup shot before touching caption style.
The recurring failures are consistent enough to check by name. A decorative intro delays the proposition you promised. Captions that jump mid-phrase break reading rhythm. Music loud enough to cover weak pacing hides a problem that still shows up in the graph. Effects added before the narrative cut was stable usually mean someone polished a sequence that needed restructuring.
Save the finished video to your phone, open it once on mobile data, and listen where the post will play. If picture and sound drift apart after export, test sync on the device you plan to publish from before blaming the cut; the adjustment is often frame-level, and a focused guide to syncing video and audio shows the check. Every shot should clarify, demonstrate or intensify the promised highlight. If you cannot say which of the three a shot does, it is the first thing to go.
Choose Your Editing Route and Publish This Week
Pick the route by how often you shoot talking-to-camera footage. If you already edit on a desktop and have a routine you trust, run the sequence and the checks above on your next clip and change nothing else.
If you film yourself or your clients several times a week, the manual pass is where the hours disappear. Mimic is an AI UGC editor that turns a raw clip into a finished UGC video: you pick a UGC style, drop in your clip with any demos or images, and get back a captioned, cut video ready to post, with no editing experience needed. For teams putting videos together at that volume, it removes the repetitive assembly without changing the standards above.
One recording usually earns more than one cut. A 2024 short-form video study covering 47,648 YouTube channels and 61,616 TikTok accounts measured average views of 18,173.32 for TikTok videos and 16,152.88 for Instagram Reels, which is the size of the field each version competes in. Because captions and the rights check sit inside the edit order, each new version only needs a review pass on pacing and wording rather than a rebuild from the raw file.
This week, take one raw clip. Score its moments, write the viewer action, run the rights list before you build around anything, cut the hook first, then export a test and watch it on your phone before it goes out.
One clip scored and exported this week beats a folder of raw footage waiting for a free afternoon.
Mimic takes the same sequence you just read and does the assembly work: it cuts the pauses, captions every word in the style you choose, and places your product shots inside the clip, so the pick, cut and check steps need far less manual assembly. Drop in one raw recording and review the export on your phone before it goes out, since automated output can still carry mistakes, including in the transcribed captions. Start at Mimic.