How to Make a Split Screen Video for Phone and Desktop
Learn how to make a split screen video: pick a layout, sync two clips, fix audio and captions, and export a clean vertical or widescreen file.
You've filmed yourself talking to camera. You've also got a clean product demo, a screen recording, or a guest's clip sitting in another file. Cutting away to it loses your face, and staying on your face loses the proof.
That's the problem split screen solves, but only if you treat it as a speech and attention problem, not just a layout trick. Here's how to make a split screen video that stays readable, synchronized, and clear about who's speaking.
Choose a Split Screen Layout and Canvas Size
Say you want your talking clip on top and a product demonstration underneath. Set the canvas first, before you place either file. If you build the layout and change the aspect ratio afterward, you'll recrop everything and probably cut off a face or label.
Pick the canvas from the destination, then pick the proportion from who needs to lead. A 50/50 split works for a fair comparison. I would use 60/40 as the default when one speaker must dominate, because the smaller panel still provides context without stealing the first look.
| Layout | Canvas (px) | Best for |
|---|---|---|
| Vertical 9:16, 50/50 top and bottom, panels 1080x960 each | 1080x1920 | TikTok, Reels, Shorts |
| Vertical 9:16, 60/40 top and bottom, panels 1080x1152 and 1080x768 | 1080x1920 | Speaker-led talk plus demo |
| Widescreen 16:9, 50/50 side by side, panels 960x1080 each | 1920x1080 | YouTube and desktop ads |
| Square 1:1, top and bottom, panels 1080x540 each | 1080x1080 | Feed posts |
| Vertical 9:16, three stacked panels, 1080x640 each | 1080x1920 | Reactions or comparisons |
More panels aren't automatically better. The Columbia film glossary entry on split screen traces the technique through Abel Gance's 1927 film "Napoleon," which used three projectors and three screens, and Mike Figgis's 2000 film "Timecode," which presented four stories simultaneously in four screen quadrants. Two panels divide attention between two sources. A third adds another stream, so you need tighter control of scale, contrast, and motion.
Give Every Panel One Job
Use two panels for speaker plus demonstration, comparison, or reaction. Use three only when every view stays legible on a phone, and reserve four quadrants for short, tightly coordinated moments. If you're still deciding how two visuals should sit together, this guide to placing two pictures side by side covers the composition choice.
Practical rule: Choose the layout from the platform first, then choose the proportion from who matters most in the frame.
How to Build the Split Screen Step by Step
This sequence works in any timeline editor, whether you're using CapCut, Premiere Pro, DaVinci Resolve, or a similar tool. The order matters more than the software. Here's the build at a glance before you start placing clips.
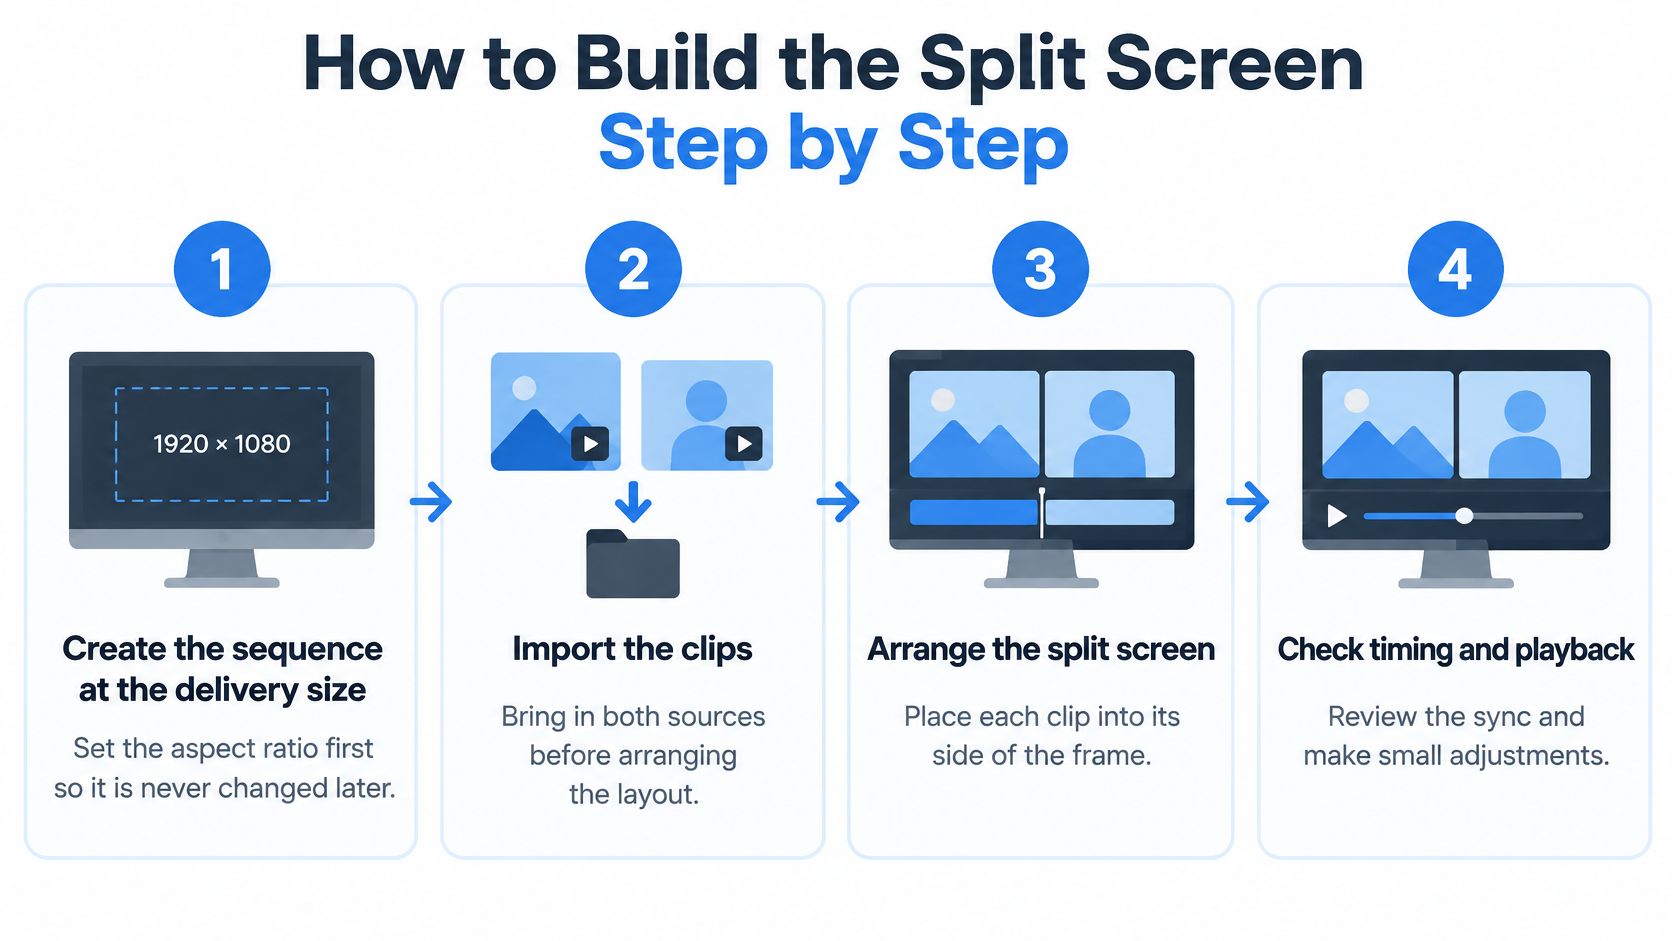
The AutoShort split screen guide describes a canvas-first, track-based workflow using 1080x1920 for vertical Shorts, Reels, and TikTok, or 1920x1080 for standard widescreen video. It also recommends separate tracks, cropping instead of stretching, and export in H.264 at approximately 8 to 12 Mbps for 1080p.
Build in This Order
- Create the sequence at the delivery size. Set 1080x1920, 1920x1080, or your chosen canvas before positioning footage. Setting aspect ratio after layout is an avoidable rebuild.
- Put each source on its own video track. Place the talking clip on track 1 and the demonstration or screenshots on track 2. Separate tracks let you move, trim, and crop one panel without disturbing the other.
- Sync on a sharp sound. Zoom into both waveforms and align the spike from a clap or hard consonant. Nudge one frame at a time, then play a full sentence to check lip movement.
- Crop into the panel, don't stretch. Use scale and crop or fill so the source covers its assigned area. Stretching a mismatched clip widens faces and distorts product labels.
- Start at 50/50, then test 60/40. Give the primary speaker the larger share if facial expression carries the point. Add a narrow divider or contrasting background so adjoining scenes don't visually merge.
- Place captions inside the speaking panel. Put short captions just above the dividing line when the speaker is on top, and place any title on the divider area without covering either face. Keep text away from the seam itself so it doesn't look attached to both panels.
- Export at the project frame rate. Use H.264 and hold a 1080p export around 8 to 12 Mbps. Scrub the finished file from start to end to confirm both panels stay locked.
Watch this short demonstration of the timeline process, then compare it with your own sequence settings before you export.
Watch the Two Quiet Causes of Drift and Softness
A clip shot at 30 fps inside a 25 fps sequence can drift over a few minutes, even if the opening clap lines up. Match the sequence to the main source, or conform the secondary clip before you fine-tune the sync. Don't chase individual words until the frame rates agree.
High-resolution originals give you cropping room because you can reframe without enlarging pixels. Scaling a small source beyond its effective resolution softens eyes, captions burned into footage, and small product details. If one panel is visibly softer, make it the smaller panel rather than sharpening it aggressively.
Lock sync before you polish the split. A beautiful divider won't save dialogue that's drifting away from the speaker's mouth.
Sync Audio and Pick a Primary Voice
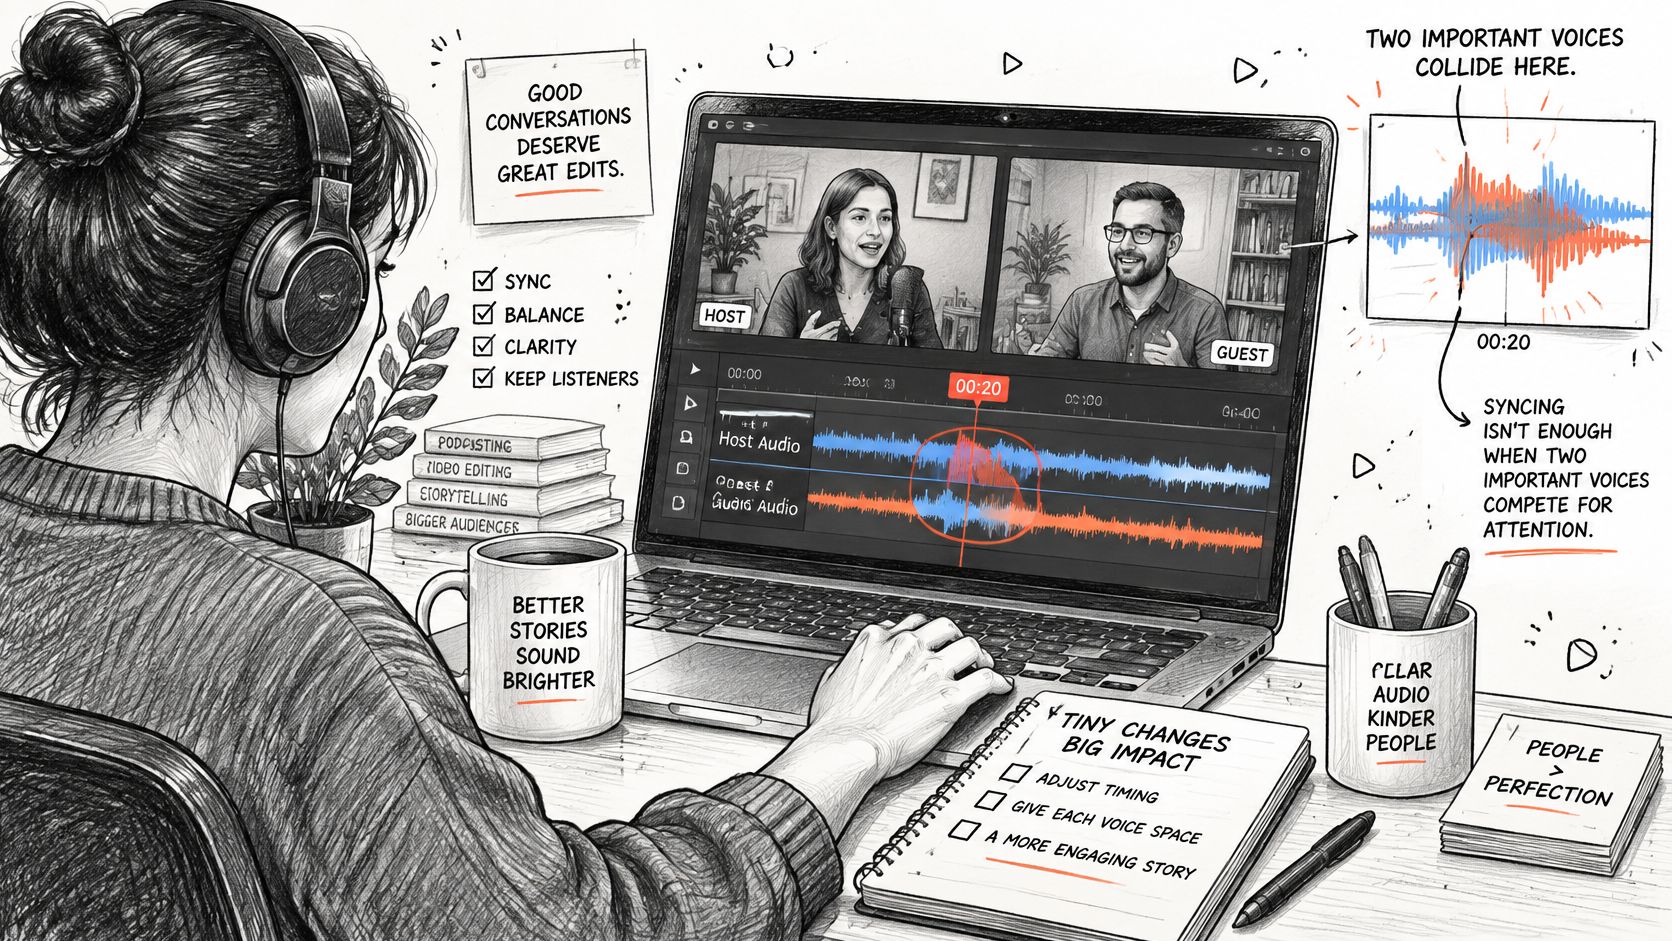
Say you record a remote interview and, around the 20-second mark, you and your guest answer at the same time. Both waveforms can be perfectly aligned and the line can still be unintelligible. Synchronization solves timing. It doesn't solve competing speech.
That distinction is central to the Riverside guide to split screen video editors, which highlights audio direction and conversational intelligibility, the need to designate a primary voice, lower or mute the secondary track, and keep captions visually attached to the active speaker. It also frames the key choice as conversational overlap versus alternating dialogue.
Here's the working setup for balancing two speakers while you decide which voice should lead each moment.
Decide Who Owns Each Line
First, match the basic loudness of the recordings so a phone clip and a laptop call don't jump in volume. Then assign ownership line by line. Keep the primary voice at full level, lower the secondary voice under reactions, and mute it when it contains only room noise, keyboard sounds, or a duplicate feed.
For brief natural overlap, such as laughter or a quick "exactly," conversational overlap can stay. When overlap hides a name, number, instruction, or punchline, cut to alternating dialogue and let each line play alone. I would rather lose a fraction of spontaneity than make viewers replay a sentence to work out who said it.
Handle Echo as a Source Problem
Play the edit on earphones and listen for the same voice arriving again from the other track. If the guest's recording picked up your voice through speakers, muting that track while you speak is cleaner than trying to EQ the echo away. Use the cleaner recording as the anchor and bring the second track in only for its owner's lines.
This matters just as much in a polished talking head video, where the viewer has little visual information beyond the speaker. Move the caption to the active speaker's panel whenever the primary voice changes. That one visual cue tells viewers where to look before they've decoded the new voice.
Frame Faces and Captions for a Phone Screen
Design for a viewer holding a phone at arm's length, possibly with the sound off. A split that looks spacious on a desktop monitor can turn a face, label, or app button into guesswork on a small screen. Every framing choice should survive that smaller, silent view.
Frame the Top Panel Around the Face
Leave some headroom and place the face near the middle of the upper panel. Keep the chin clearly above the dividing line, because a seam through the neck or mouth looks like an editing accident. Eyes should sit high enough that captions below them don't compete with facial expression.
If the original framing is loose, crop in rather than leaving a tiny head floating in a wide room. The background matters less than readable expression. Check the tightest moment too, especially if the speaker leans toward the camera or gestures across the lower edge.
Protect Detail in the Bottom Panel
Show screenshots whole on a black or neutral background instead of cropping their edges to fill the panel. Cropping may remove prices, buttons, before and after labels, or the result you're asking viewers to notice. A small amount of empty background is better than a full-bleed image with its evidence missing.
Zoom only when the source stays sharp. Read every product label at normal phone size, not in the editor's enlarged preview. If the price or instruction isn't legible, enlarge that detail briefly or replace the panel with a closer shot.
Attach Captions to the Right Person
- Keep chunks short: Show one or two words at a time when the pace allows, with strong contrast and enough reading time.
- Keep captions inside one panel: Attach each caption to its speaker so viewers don't assign the line to the silent face.
- Avoid stacking across the seam: Two simultaneous lines straddling the divider create a third reading task between the images.
When both panels contain speech, alternate caption placement with the active voice. When the demonstration carries essential information that speech doesn't explain, add a transcript or short on-screen description. That description should state the action or result, not repeat decorative details. It gives silent viewers the missing fact without forcing them to infer it from a small moving image.
Fixing Sync, Stretch and Caption Problems
Audio drift is the fault viewers notice first because lips and words separate gradually. Fix the cause, then recheck both panels. A crop, rate change, or caption move in one panel can expose a new problem in the other.
| Symptom | Likely cause | Fix |
|---|---|---|
| Audio drifts after a few minutes | Clips recorded at different frame rates | Re-sync on a clap and match the sequence frame rate to the source |
| Faces look wide or squashed | One clip stretched to fit its panel | Recrop with fill instead of stretch |
| Caption crosses the dividing line | Caption placed on the seam | Move it just above the line and cut it to one or two words |
| Two voices talk over each other | Overlapping lines on both tracks | Choose a primary voice and lower the secondary track, or alternate the lines |
| Export looks soft | Source scaled above native resolution | Export at source size and hold 8 to 12 Mbps for 1080p |
Recropping, moving captions, and changing the primary voice usually take minutes. Echo baked into the only recording or a missing sync reference may need a partial re-recording. For a deeper repair workflow, see these methods to sync video and audio before you rebuild the layout.
After every fix: Play the section before and after the repair. Split screen problems rarely stay contained inside one panel.
Check the Export and Publish Your Split Screen
Export a test file and watch it on a phone at normal playback size. Don't approve the edit from a large timeline preview, because that's not the view your audience gets. The final pass is about allocation of attention, not just technical neatness.
The Sciety record for a preregistered split-screen study reports a first study with 75 participants and a second with 100 participants, with no strong memory or comprehension penalty from simultaneous presentation, although the second study reported higher interest for non-split-screen video. It also notes separate experimental work in which split-screen formats combined with high numbers of scene changes could induce cognitive overload and reduce attention and memory. Use your cut points to preserve continuity instead of adding rapid transitions between already busy panels.
Run the Phone QA Pass
- Panel identity: Can a first-time viewer tell immediately which half is the speaker, guest, demonstration, or reference?
- Facial visibility: Are eyes and mouths clear of the divider, captions, and platform controls?
- Readable captions: Does every caption belong to one panel, stay long enough to read, and match the spoken words?
- Audio balance: Is the primary voice obvious, with no echo or secondary speech masking a key line?
- Synchronized action: Does the demonstration change when the speaker refers to it, rather than a beat too late?
- Clean edges: Has anything important been accidentally cropped at the seam or outer frame?
Read the captions line by line before posting. A technically checked export is still a draft if a product name, number, or instruction has been transcribed incorrectly. Users should review their video before publishing it, because automated output can contain mistakes, including in transcribed captions.
Build It by Hand or Use a Tool
Build by hand when you need precise control over a guest exchange, an unusual crop, or a sequence where panel sizes change. That control costs time because you're managing sync, framing, captions, audio ownership, and export checks yourself.
If you'd rather skip manual layering, Mimic's built-in UGC styles include Split screen, alongside formats such as Bold keywords, App demo, and Highlight captions. You can add product shots or a screen recording, and Mimic places them in the video. On a computer, a finished Mimic video downloads as an MP4 file, and you should still run the same phone check before publishing.
Make the final decision in three steps. Choose the layout from the platform and lead panel, watch the export muted and then with sound, and post only when the active speaker and supporting image are obvious without replaying it.
Ready to skip the manual tracks, crops, and divider adjustments? Mimic offers a built-in Split screen style for talking-to-camera clips with product shots or screen recordings placed into the edit. Add your footage, review the finished video, and publish a version that's built for phone viewing.